Course overview and creating posts
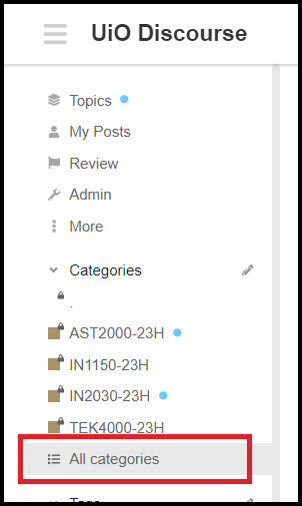
When you log in to Discourse you can find your courses below "Categories" on the left side of the screen. Click on the course you want to visit.
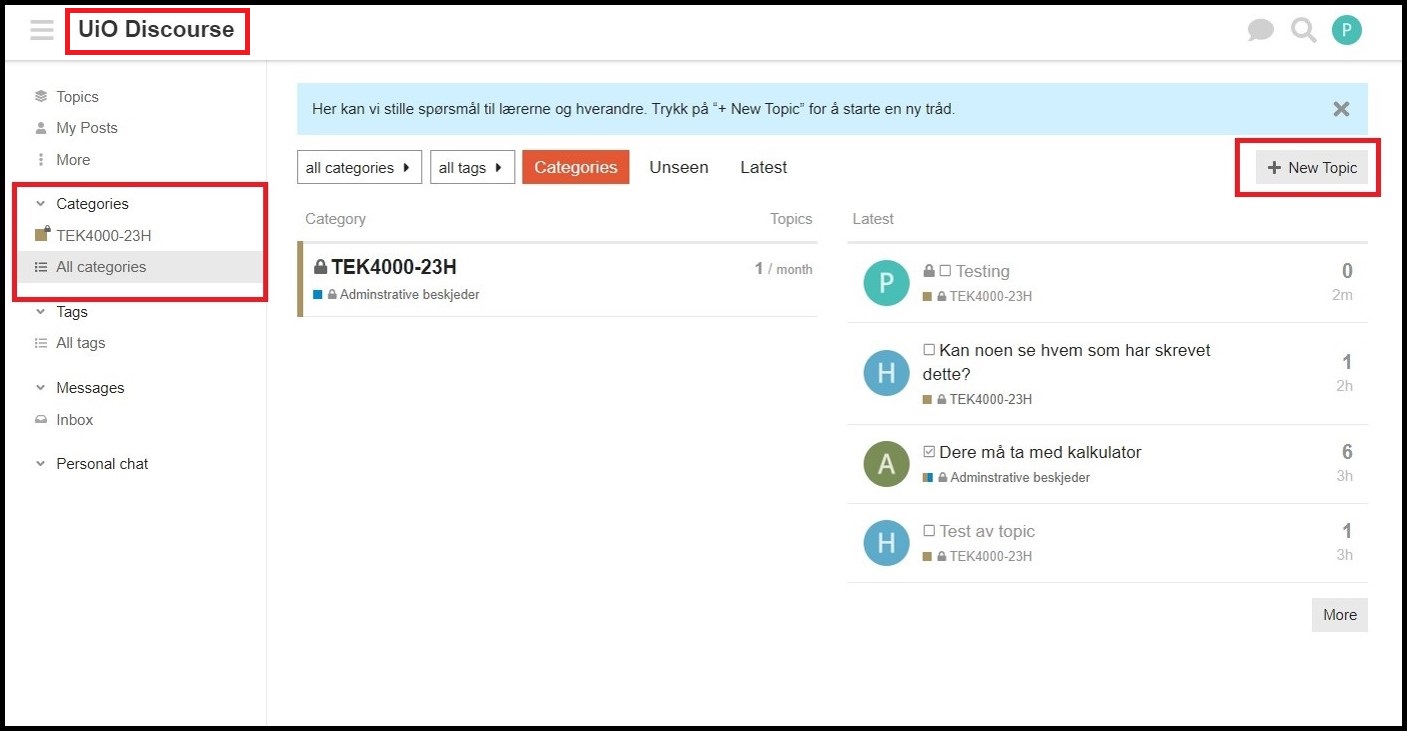
In order to get back to the course overview main page, click on "UiO Discourse" in the top left corner (marked in the screenshot above).
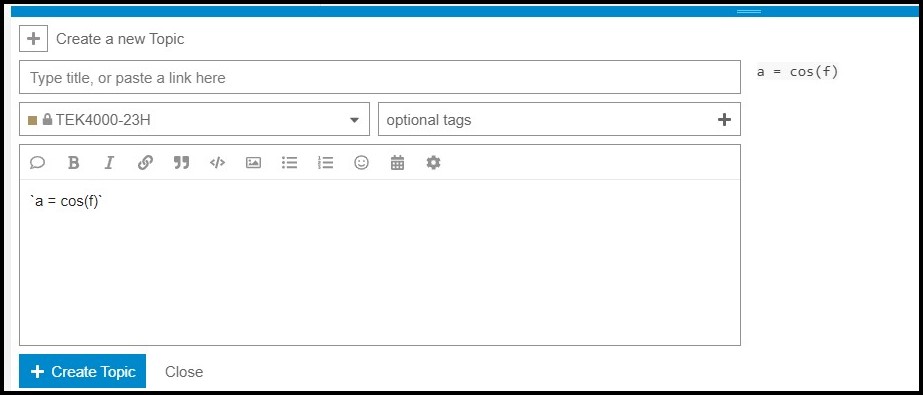
To write a post (Topic), click on the "New topic" button, shown on the right side in the screenshot above. When you click "New topic" this pop-up will appear in the middle of the screen:
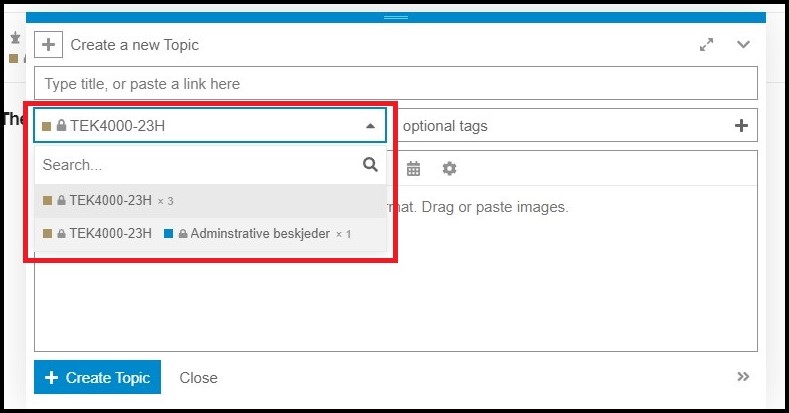
If your course has sub-categories you can choose to add your post to one of these in the drop-down menu, shown in the screenshot above.
Writing math and code
To write math (LaTex-inline), i.e. equations within your post, you need to insert dollar signs ($) at the start and at the end of your equations :
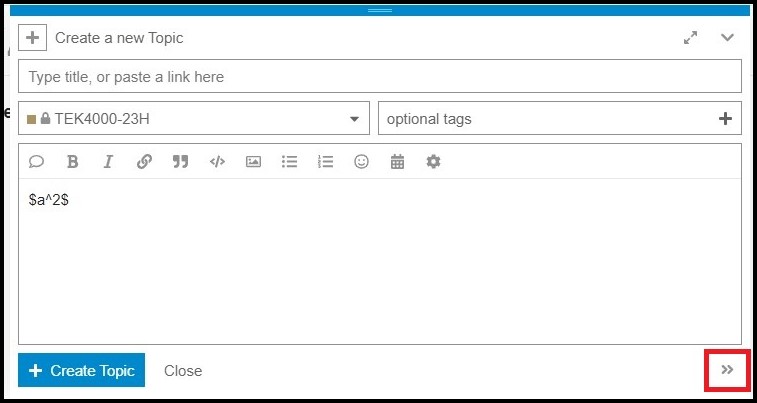
If you can't see the real time preview of your equation, click the arrow symbol in the bottom right of the editor pop-up (see screenshot above).
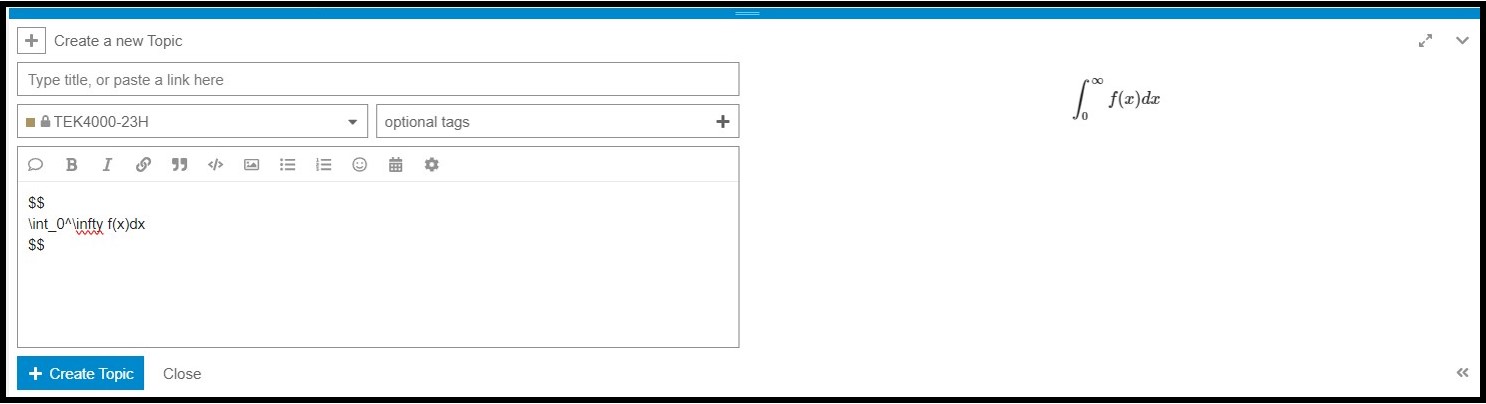
To write a longer equation on a separate line, write two dollar signs ($$) on a separate line, then write the equation on the next line and finally add two dollar signs on a separate line:
To write code inline, use one single apostrophe (in reverse) "`":
Three apostrophes (```) before and after the code on separate lines allows you to write longer sections of code:
![]()
Setting up subcategories
If you need to set up different subcategories than the default ones, please contact canvas@mn.uio.no. Once you receive confirmation that your Discourse user is updated, you can follow the instructions below:
Editing subcategories
Before you start creating a subcategory, make sure you're at the top level of your Discourse page. Click on "All categories" in the left menu to make sure you are at the right level:
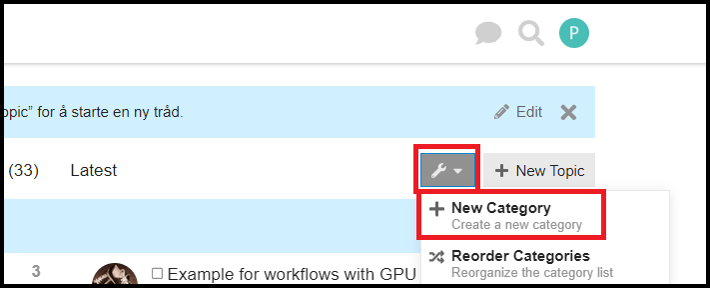
To create a subcategory in your topic, first click on the "wrench" symbol in the upper right part of the page and then select "New Category" in the drop-down menu:
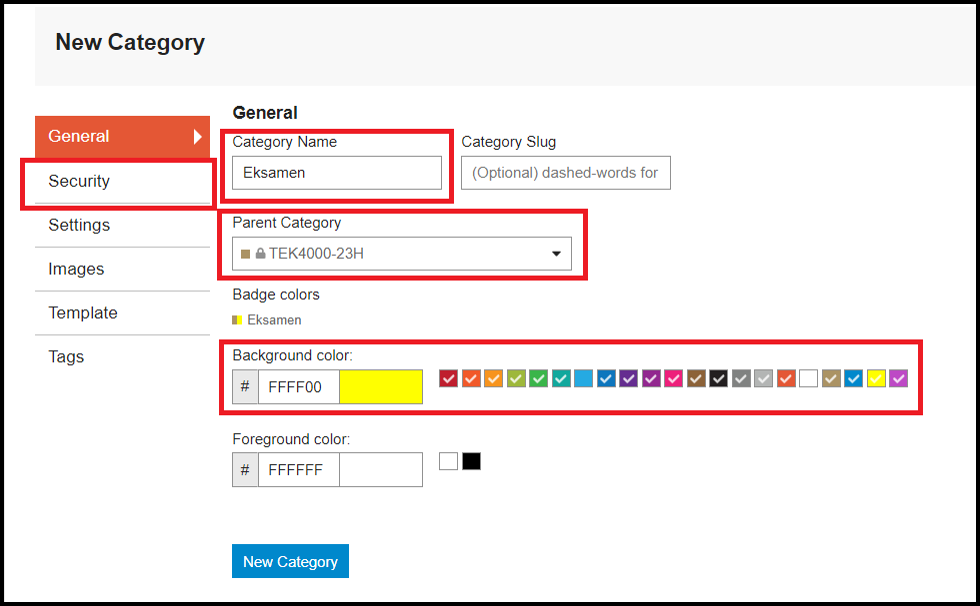
You are now in the "New category" setup menu, first enter the name of the subcategory (e.g. "Exam") and select your course as "Parent Category". You can also choose the color of the subcategory below "Background color". When you're done, click on "Security" on the left side:
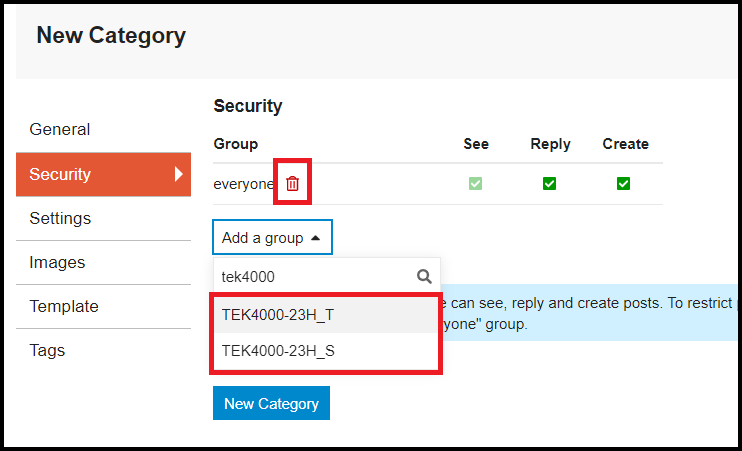
In the "Security" menu, you must first remove the group "everyone", you do this by clicking on the "trash can" symbol. You must then add the groups that should have access to the subcategory, here both the teacher group (TEK4000-23H_T) and the student group (TEK4000-23H_S) are added:
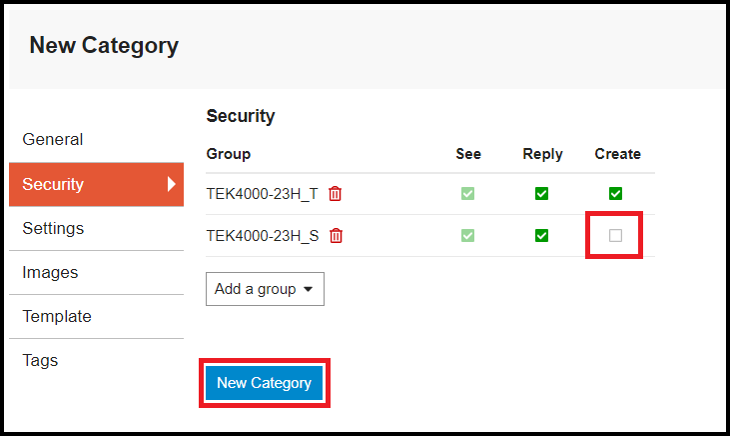
Once the groups have been added, group access can be edited. In this example, students only get the opportunity to see and respond to posts. The teaching group gets full access and can also write posts. When you are finished click on "New Category" to create the subcategory:
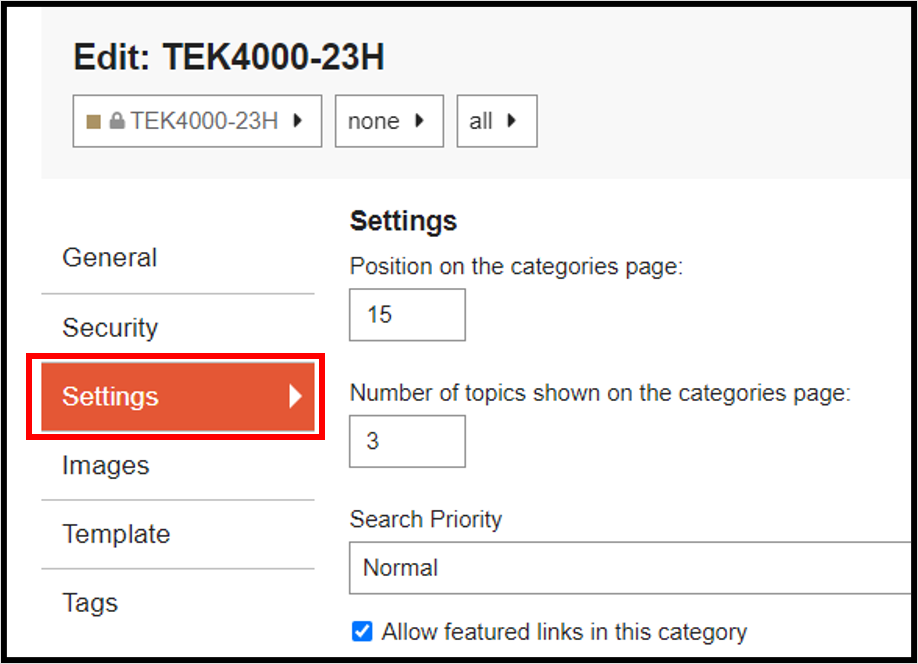
If you want to highlight the subcategories on the course page, you must first click on the course from the top level, "All categories". Then click on the "Wrench" symbol on the upper right side to enter the settings of the course. Inside the settings, first click on "Settings" and then scroll down on the page:
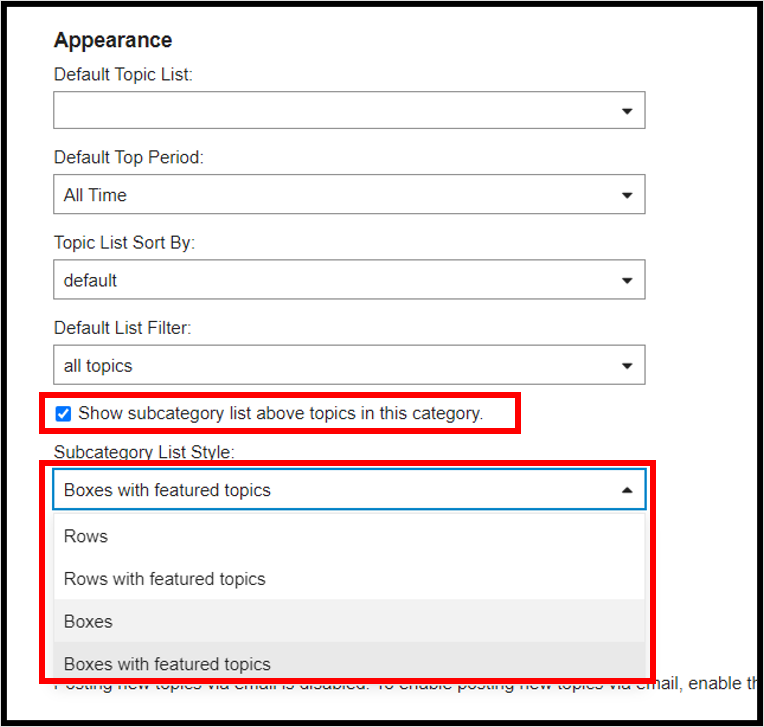
Under "Appearance" select "Show subcategory list above topics in this category", and then select the style of the list in the drop-down menu "Subcategory List Style":
When you are finished click on the "Save Category"- button at the bottom of the page.
Mark an answer as a solution
To mark a reply to a post as a solution, click the tick box below the reply:
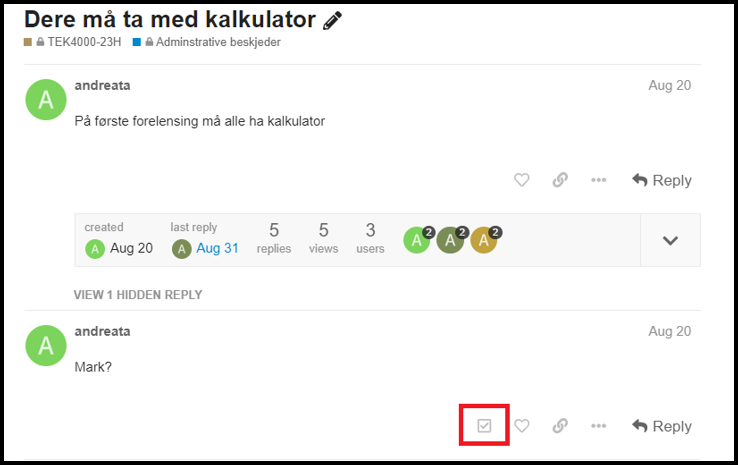
The answer will then be highlighted as a solution within the original post.
Setting up notifications
You can be notified by email about new posts. You may choose to follow only questions which you have asked or discussions where you have participated or you may choose to follow certain discussions.
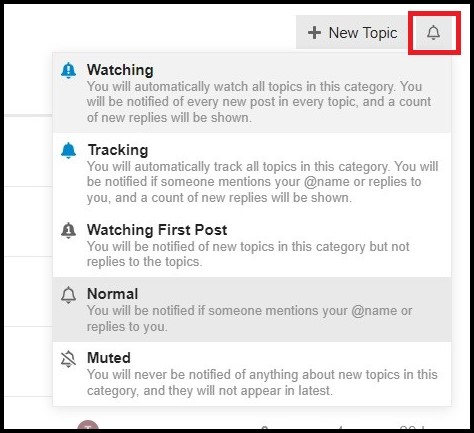
If you want to track or watch all new posts in a course, click on the "bell" symbol besides the "New Topic" button:
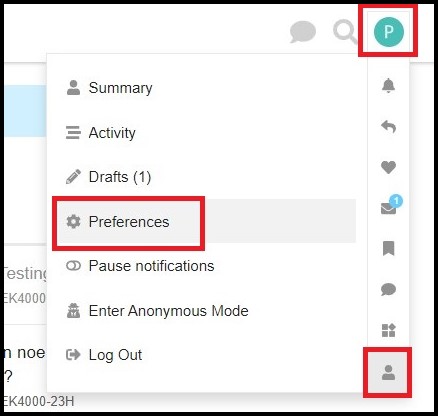
In order to change email notification preferences, click on your user symbol in the upper right corner, then click on the "person" icon and then click "Preferences":
When you are inside the preferences menu, click on "Emails". The two upper settings should be set to ‘always’, if you want to receive emails immediately for new posts:
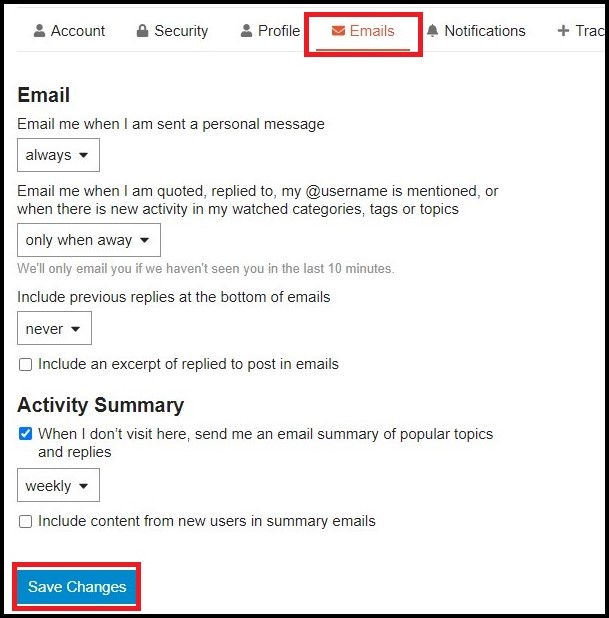
Remember to click on "Save changes" when you are done.