The Galaxy interface has three main elements: on the left a list of available tools (the toolbox), on the right the history pane, and the main tool interface in the center.
The tools in the toolbox are grouped by category, with similar tools together. As we process text, the history pane will contain a log of what has been done on which inputs, with the most recent job at the top. The history is saved, so that you can continue where you left off some other day. The main interface is where we will perform most of the actual work.
Start by opening the Import section of the toolbox, and select the Upload File tool. This lets you upload a text file from your local computer, or you can enter a URL or some sample text in the text box. This tutorial will walk through a simple sequence of processing for Norwegian text, so this will work best if you upload Norwegian text, which should be free of mark-up or other non-textual elements. When you are done, click the Execute button to upload your text to LAP.

Once you execute a tool, a box appears in the history pane on the right. All submitted jobs will be listed here, with the most recent ones on top. Jobs start out colored yellow, while the job is queued for processing on Abel and while it is running, and once the job is completed it will turn green. If something goes wrong during processing, it will turn red.
Now that our text is uploaded, we can proceed with the first actual processing step of our pipeline: Open the Oslo-Bergen Tagger section of the tools, and select OBT Segmenter & Multi-Tagger. This tool will take the raw text we just uploaded and segment it into sentences and tokens, and for each token find a list of possible morphological analyses of that word.
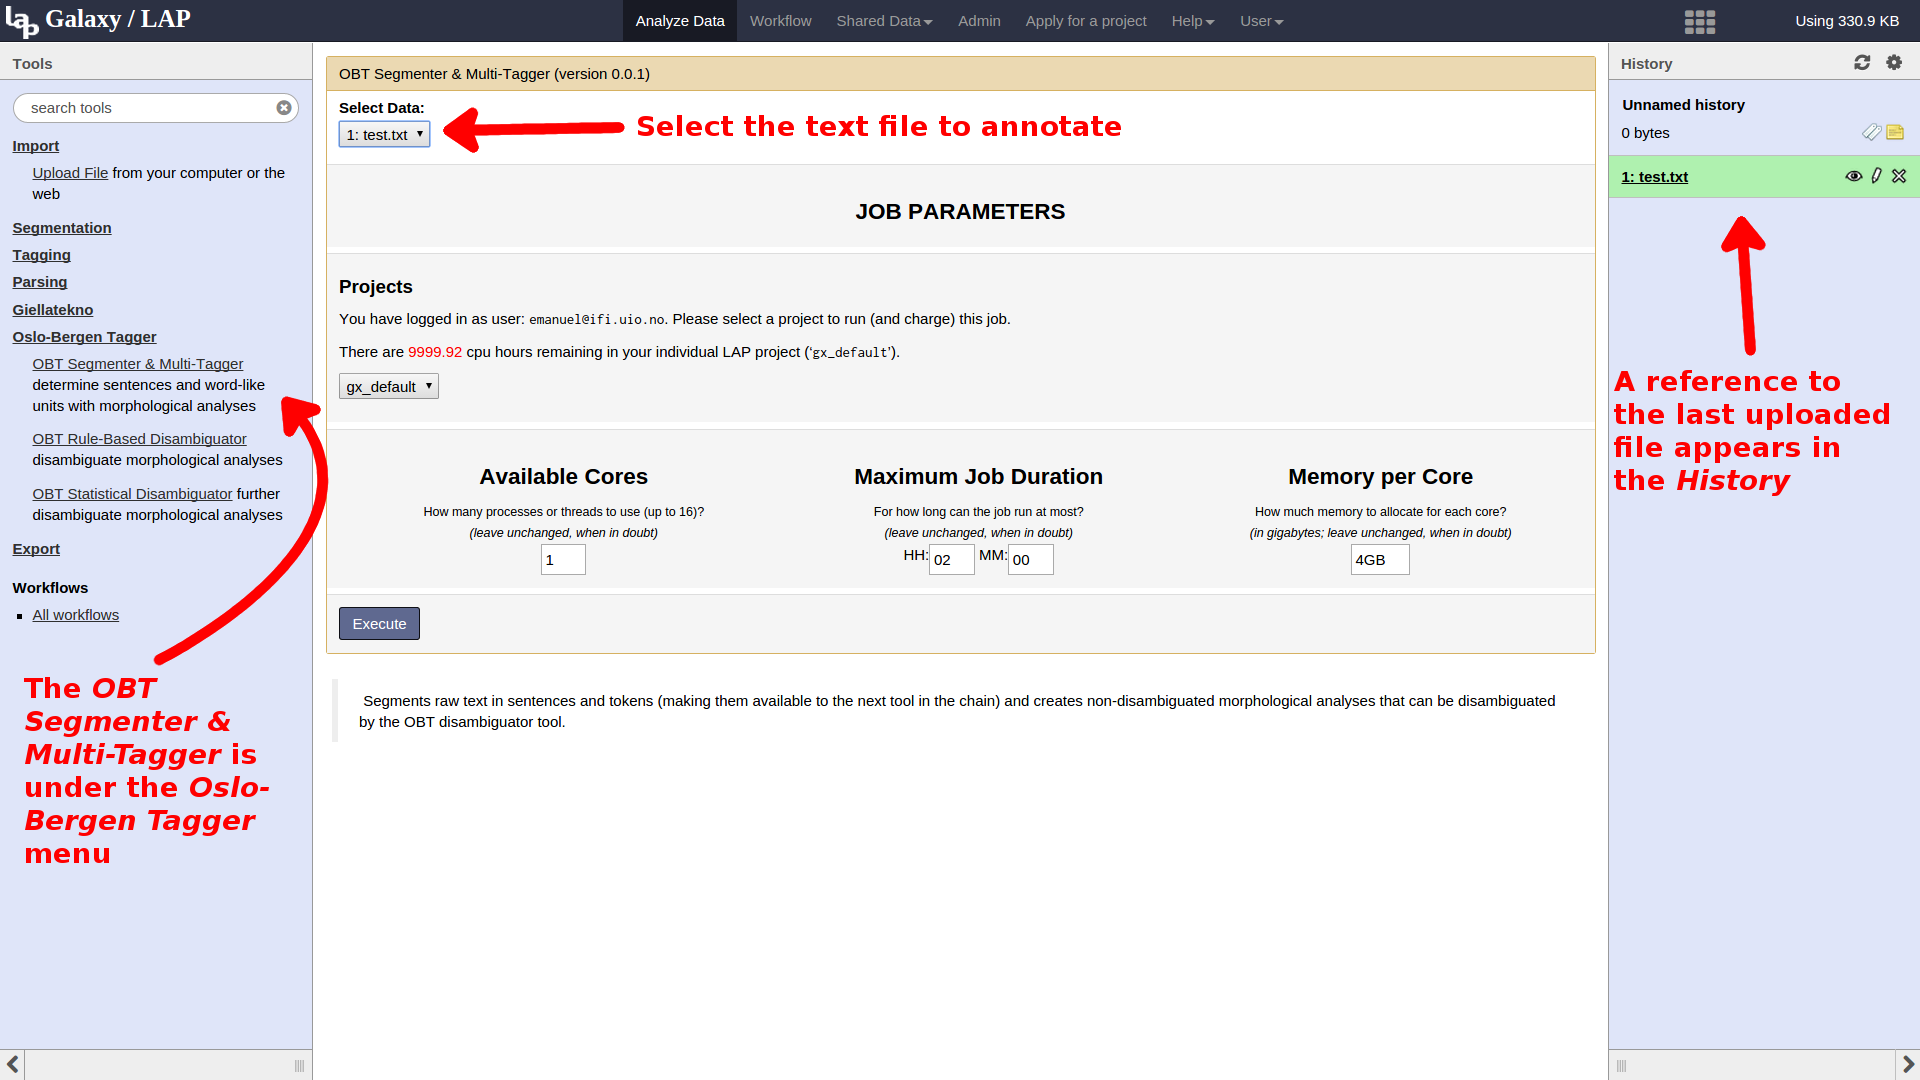
At the top of the tool interface, you can select the data set to be processed. This defaults to the most recent data set of the appropriate type, so it will often be what we want. Below this is a set of configuration options (cores, duration, and memory) that regulate how the job is executed on the Abel compute cluster. The default settings are fine for most things, and these options should in general be left as they are unless you know what you are doing. Everything should be fine for our processing, so we can just hit Execute.
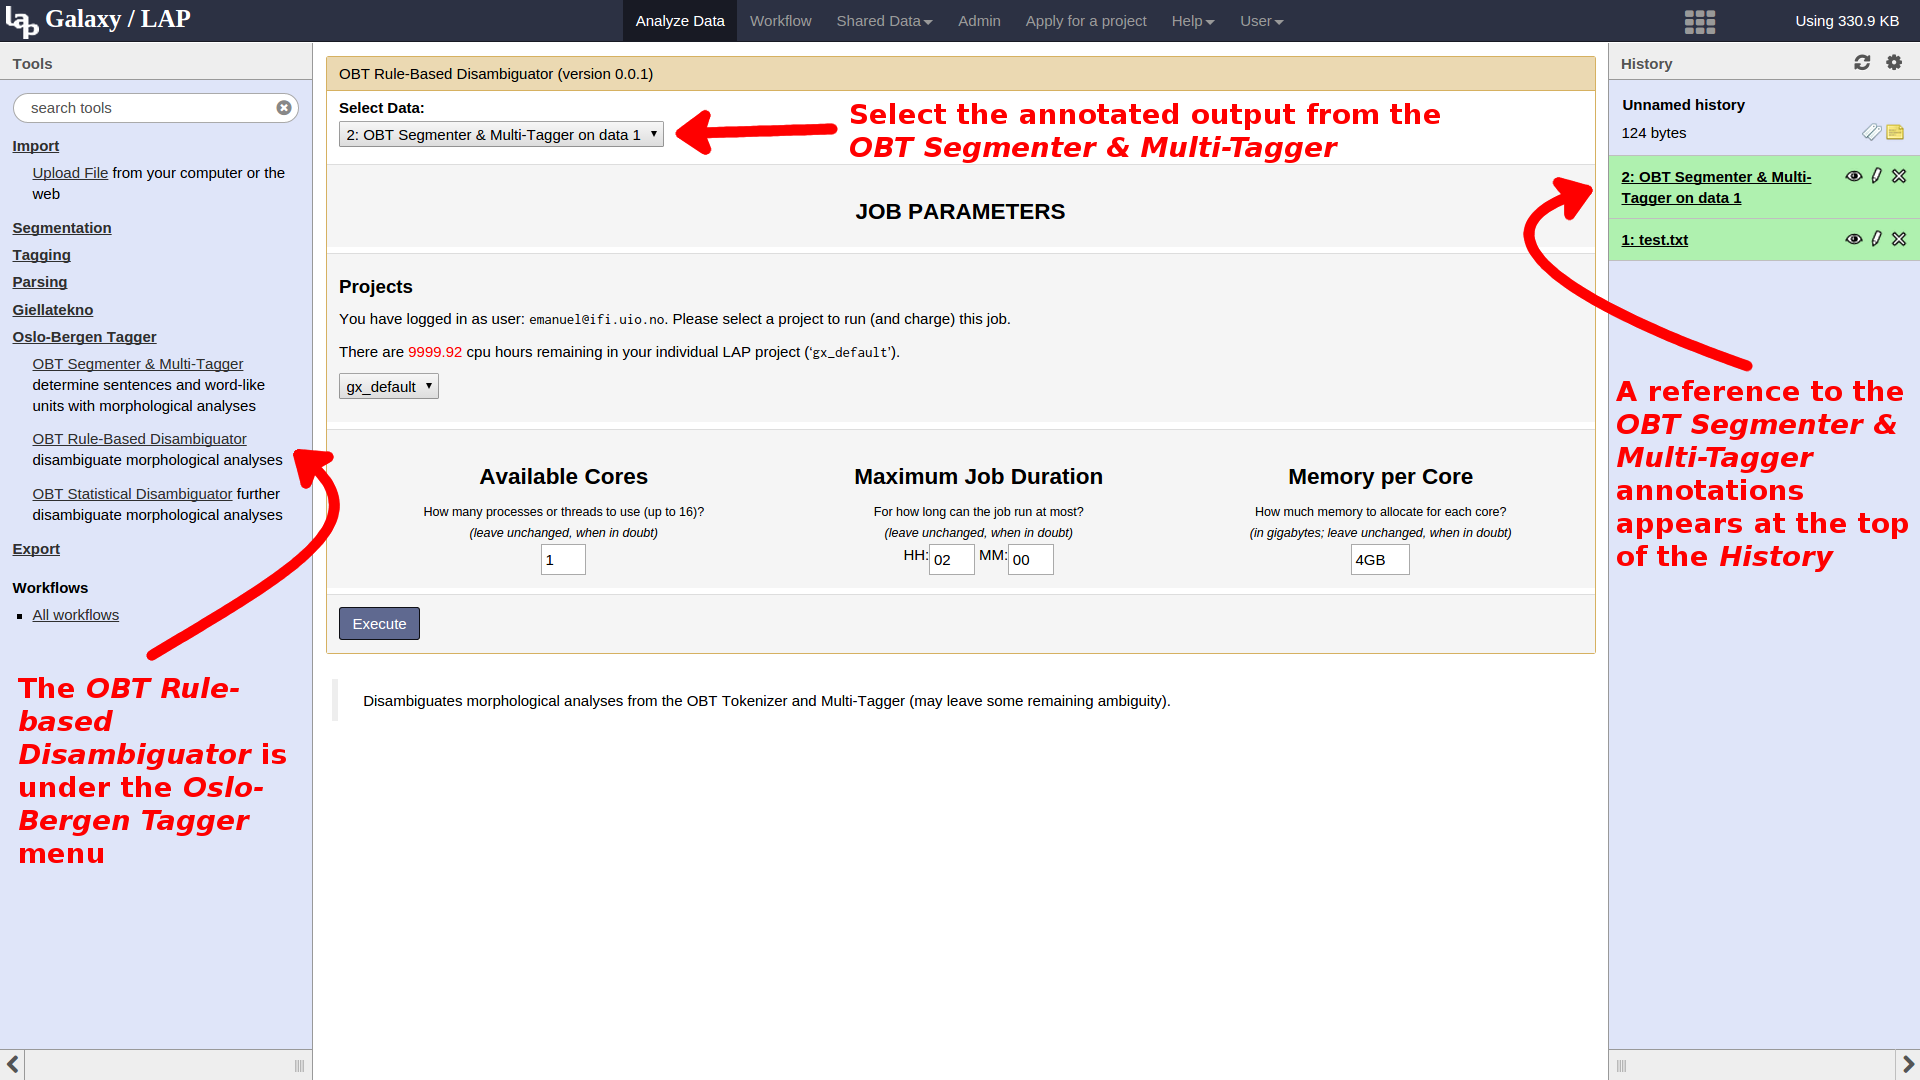
While the multi-tagger is queued, we can already move on to setting up the next step in the pipeline: disambiguation. Select the OBT Rule-based Disambiguator from the toolbox, and start it on the output of the multitagger. Note that there is no need to wait for the multi-tagger to complete before submitting the next step in the pipeline; the disambiguation job will not be started until the multi-tagger has completed successfully.
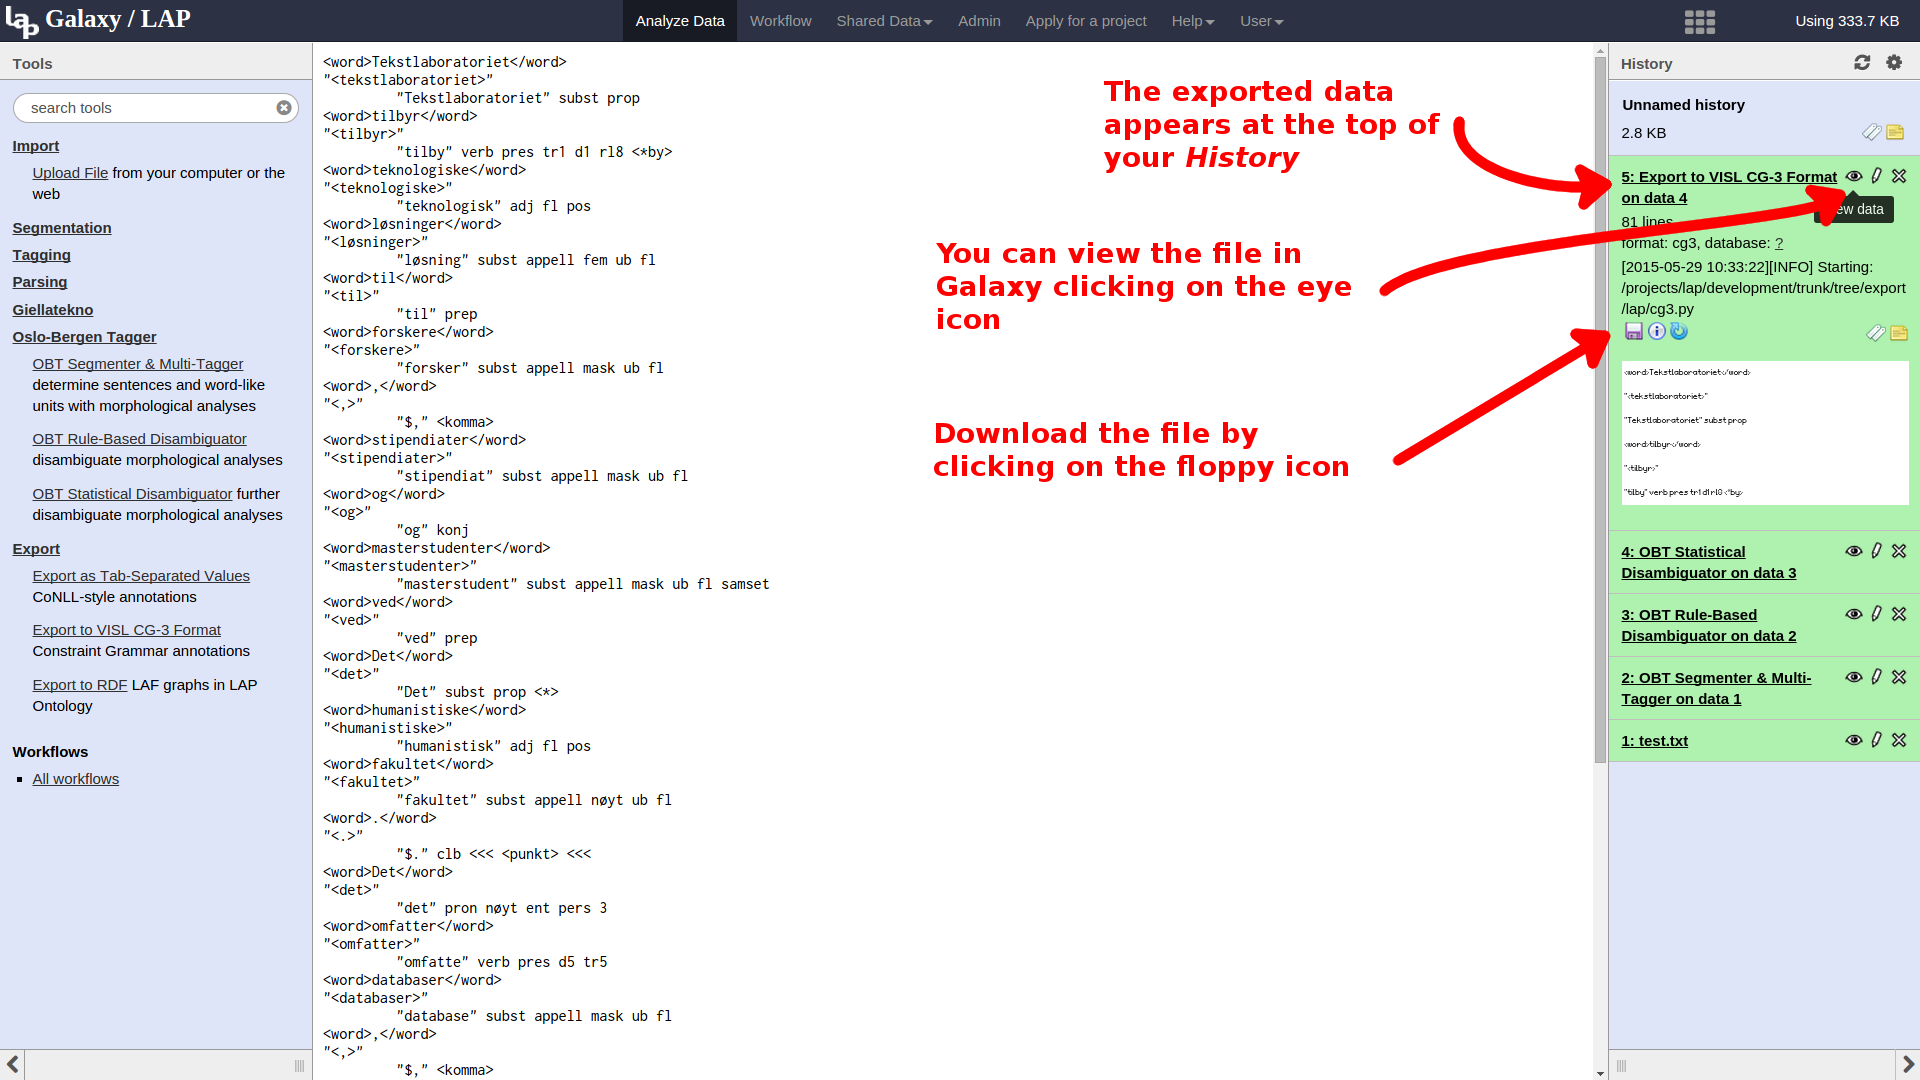
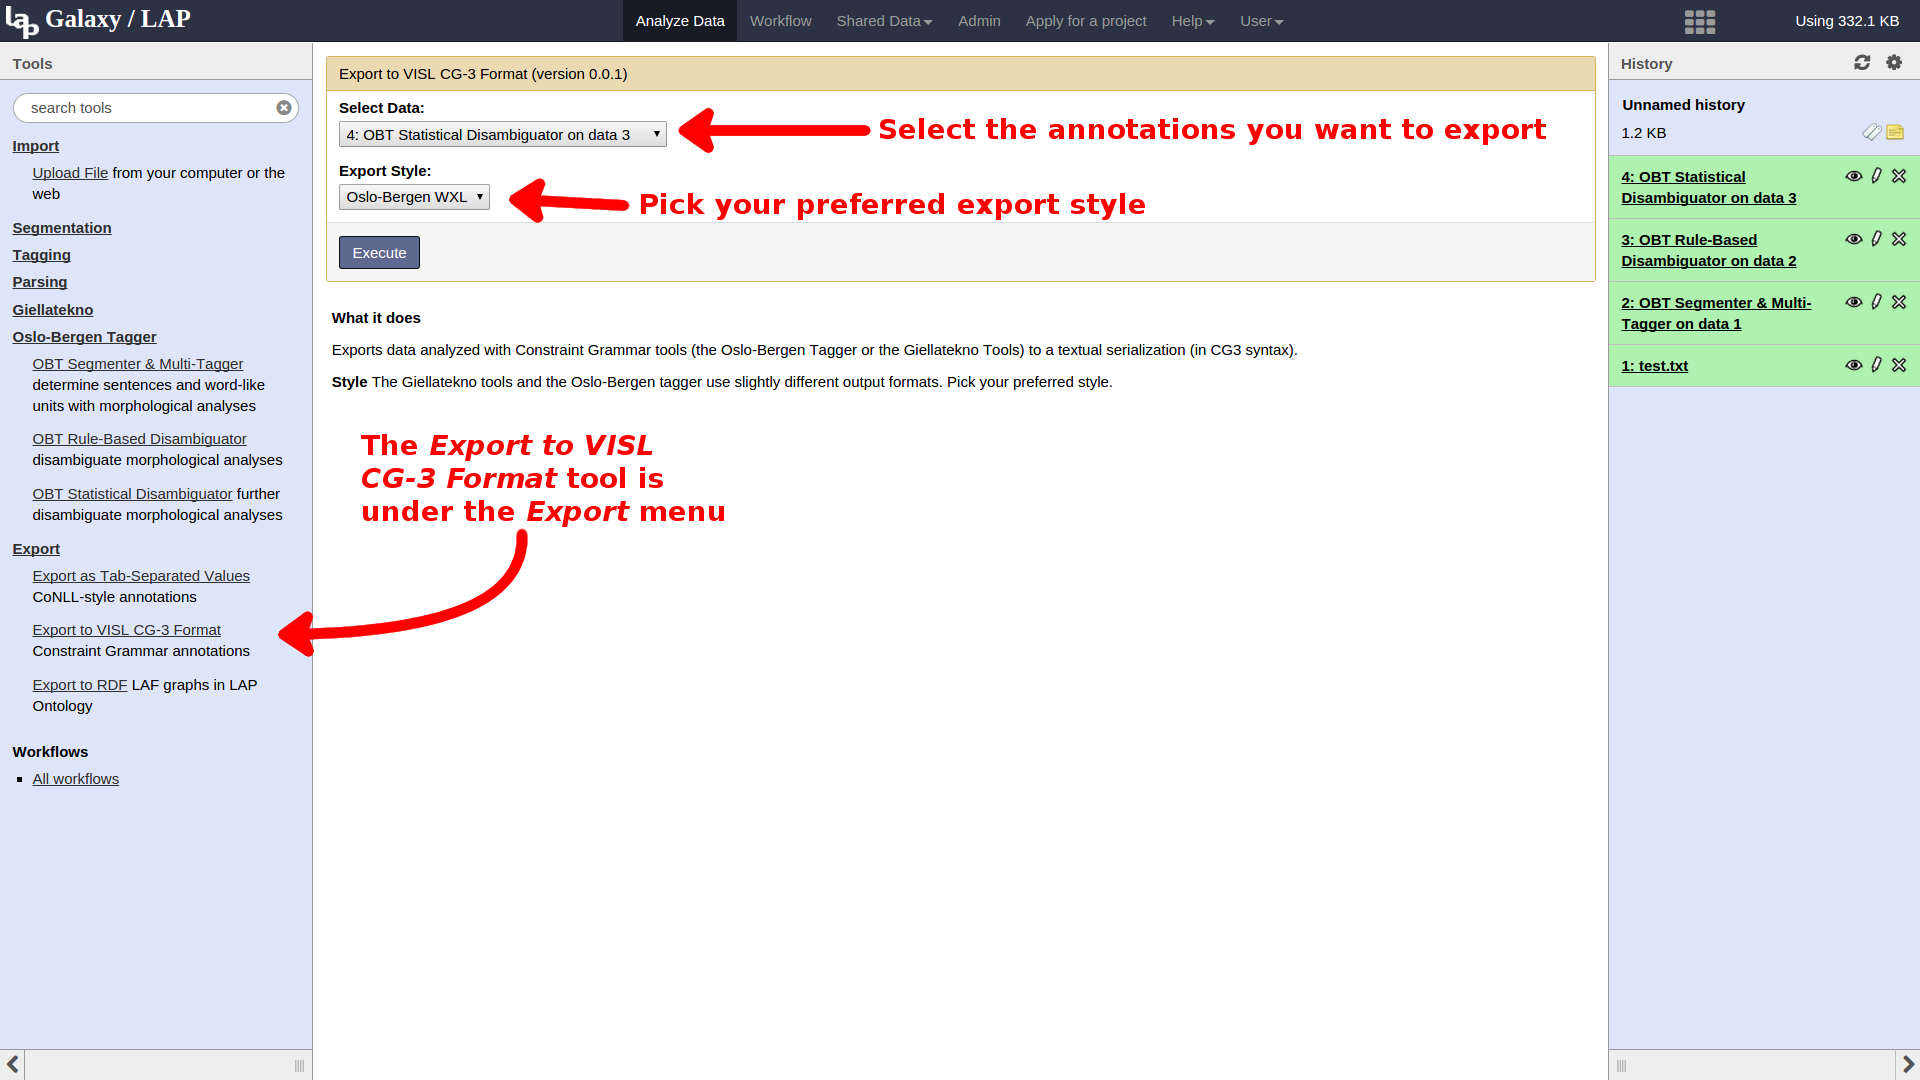
After the disambiguation step is complete, we can export our processed data. Under the Export section of the toolbox, select the Export to VISL CG3 Format tool. In this tool, we are asked not only for the data set to export, but also a style for the export. Since we have been using the OBT tools here, select the Oslo-Bergen WXML style instead of the Giellatekno style. Execute the job and wait for it to complete.
Once the job has completed, we can click its entry in the history pane to see more detailed information about the file, its format, etc. To view the export output directly in the main pane, click the eye icon in the top-right corner of the entry in the history. To download the exported data to your computer, click the disk icon on the left between the job information and the file excerpt.